|
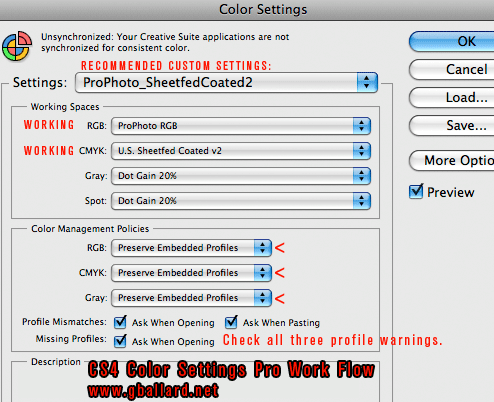
16-Bit Color Work Flow Professional This is to outline a 16-bit Photoshop scanning and Camera RAW ACR workflow in general theory. First, get a hardware-calibrated Photoshop monitor. Here is a look at my regular Color Settings in Photoshop:
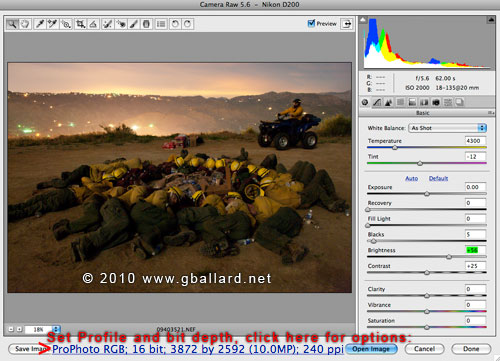
Working RGB = "ProPhoto RGB" HIGH-GAMUT, 16-BIT Working RGB With a main goal of CAPTURING as much information as possible in the camera and scanner, and PRESERVING that information as much as possible during the editing process — a super-wide working working space like ProPhoto RGB is a great professional modern working space used by many top professional photographers. ADOBE CAMERA RAW ACR, Setting 16 Bit Color In the camera, this high-bit capture is achieved by selecting camera "RAW". In theory, RAW gives us 100 percent of what the sensors can record, and opening the RAW file in Adobe Camera RAW (ACR) as a 16-bit digital image brings the photograph into Photoshop with as much color information as possible.
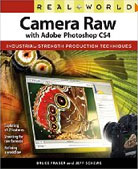
With ACR open (above) — click on the options text to set RGB space and color bit depth, this is how I set mine for my Nikon D300 .nef captures: ProPhoto; 16 bit; 382 by 2592 (10.0MP); 240 ppi. Bruce Fraser & Jeff Schewe have already written the recommended books on Adobe Camera Raw, Real World Camera Raw with Adobe Photoshop CS4 CS5: SCANNING OUT SIDE OF PHOTOSHOP Likewise, a professional scanner package will need high-end software that can capture high-resolution RGB scans in a wide-gamut color spaces like 16-bit Adobe RGB (1998) or ProPhoto RGB. I am currently using two scanners, a flatbed Epson 4990 with Silverfast AI, and a Nikon 8000 ED film scanner. My desired scanning resolution is typically set to the scanner's native Optical Resolution. In the case of the Nikon, that's 4000ppi (pixels per inch). It used to common for people to scan directly into Photoshop, but that has changed because of all the problems Adobe has had with buggy TWAIN drivers. Most pros today are scanning in the scanning software — this has the added advantage of freeing up Photoshp to multitask — in other words, we tie up the scanner application, and we can keep working in Photoshop. MASTER WORKING FILES Typically, I name my working master files "nameX.psd" — the "X.psd" reminds me the file is 16–bit — and I will generally work and archive my full resolution files in 16-bit RGB until I am ready to crop-resize-convert to a target profile. There are literally dozens of high-bit editing techniques we can use.
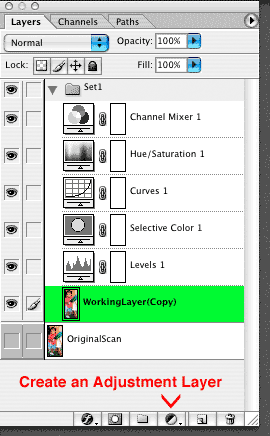
+++++ Photoshop's Adjustment Layers: An Adjustment-Layer WorkFlow allows us to save all the edits, in a nonlinear fashion, and reedit them at any time (without ever touching the original scan). This WorkFlow is PROFOUNDLY less destructive than applying each Edit individually....
+++++++ +++++ Targeting Optimal File Resolution: HERE is an Adobe User Forum excerpt, by Bruce Fraser and Jeff Schewe, on targeting file resolution — ppi pixels per inch, dots per inch dpi, lines per inch lpi — for ink-jet printers like Epsons, including RIPs.
DOWNLOAD a Working G BALLARD Production File: Current Production–Grade Quality — 6x9 inches production scan.
|
| Terms of Use • Privacy Statement • Site Map Home • About Us • Mission Statement • Press Kit • Contact Us |